- Overview
- demo
- Features
- Setup
- Getting ready
- options
- Reformat and check
- Heroku setup
- Database schema
- Todo
- Bugs or Opinion
- Django LTS
- Class Based views (ApiView)
- Django RestFramework
- User authentication
- Black
- Flake8
- Responsive Design
- Bootstrap5
- heroku
- postman exported api
To get this repository, run the following command inside your git enabled terminal
git clone https://github.com/alibigdeli/Django-Car-Tracker-AppCreate an enviroment in order to keep the repo dependencies seperated from your local machine.
python -m venv venvMake sure to install the dependencies of the project through the requirements.txt file.
pip install -r requirements.txtOnce you have installed django and other packages, go to the cloned repo directory and run the following command
python manage.py makemigrationsThis will create all the migrations file (database migrations) required to run this App.
Now, to apply this migrations run the following command
python manage.py migrateProject it self has the user creation form but still in order to use the admin you need to create a super user.you can use the createsuperuser option to make a super user.
python manage.py createsuperuserAnd lastly let's make the App run. We just need to start the server now and then we can start using our simple todo App. Start the server by following command
python manage.py runserverOnce the server is up and running, head over to http://127.0.0.1:8000 for the App.
If you want your code to be check by pep8 and all the guide lines, there are two packages added to requirements in order to check and reformat code. you can use it by this command:
black -l 79 . && flake81 - Create an account in heroku
2 - Download and install heroku cli
3 - login to your heroku account
- you will be redirected to heroku web page to login
heroku loginin linux you might run into problem with install psycopg2 and here is a fix to that, just install theses packages and then re install the python package.
Note: i am not sure if you will ran in to problem with windows or not but still linux is good to go.
sudo apt install python3-dev libpq-dev
pip install psycopg2
after installing all dependencies all you have to do is to run the server.
heroku localor
you can simply run "manage.py runserver" as normal project but dont forget to install dependencies.
In order to use this repo for production in heroku service, you have to push the repo to your heroku app.
1- create an app:
heroku create APP_NAME2- setup git directory for repo (go to your directory)
git init .
git add .
3 - deploy to heroku app
git commit -am "Initial commit"
git push heroku master
Note: you can use the one click deploy on the top of the readme too
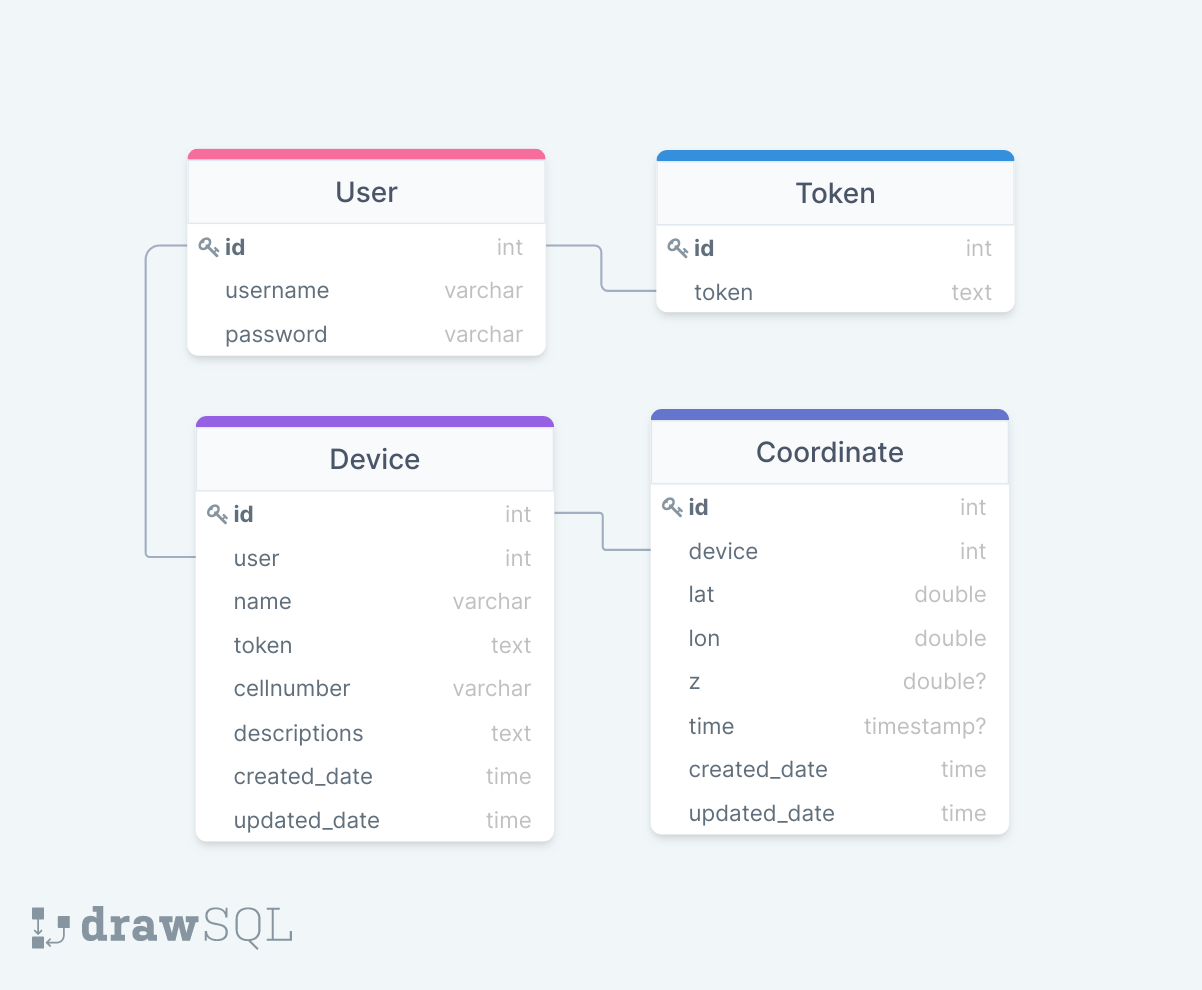
A simple view of the project model schema.
- add heroku config files
- complete the documentation
- add one click deploy mechanism
- add google api as env to configs
- test post data on gprs module
- create a video tutorial
Feel free to let me know if there are any problems or any request you have for this repo.

