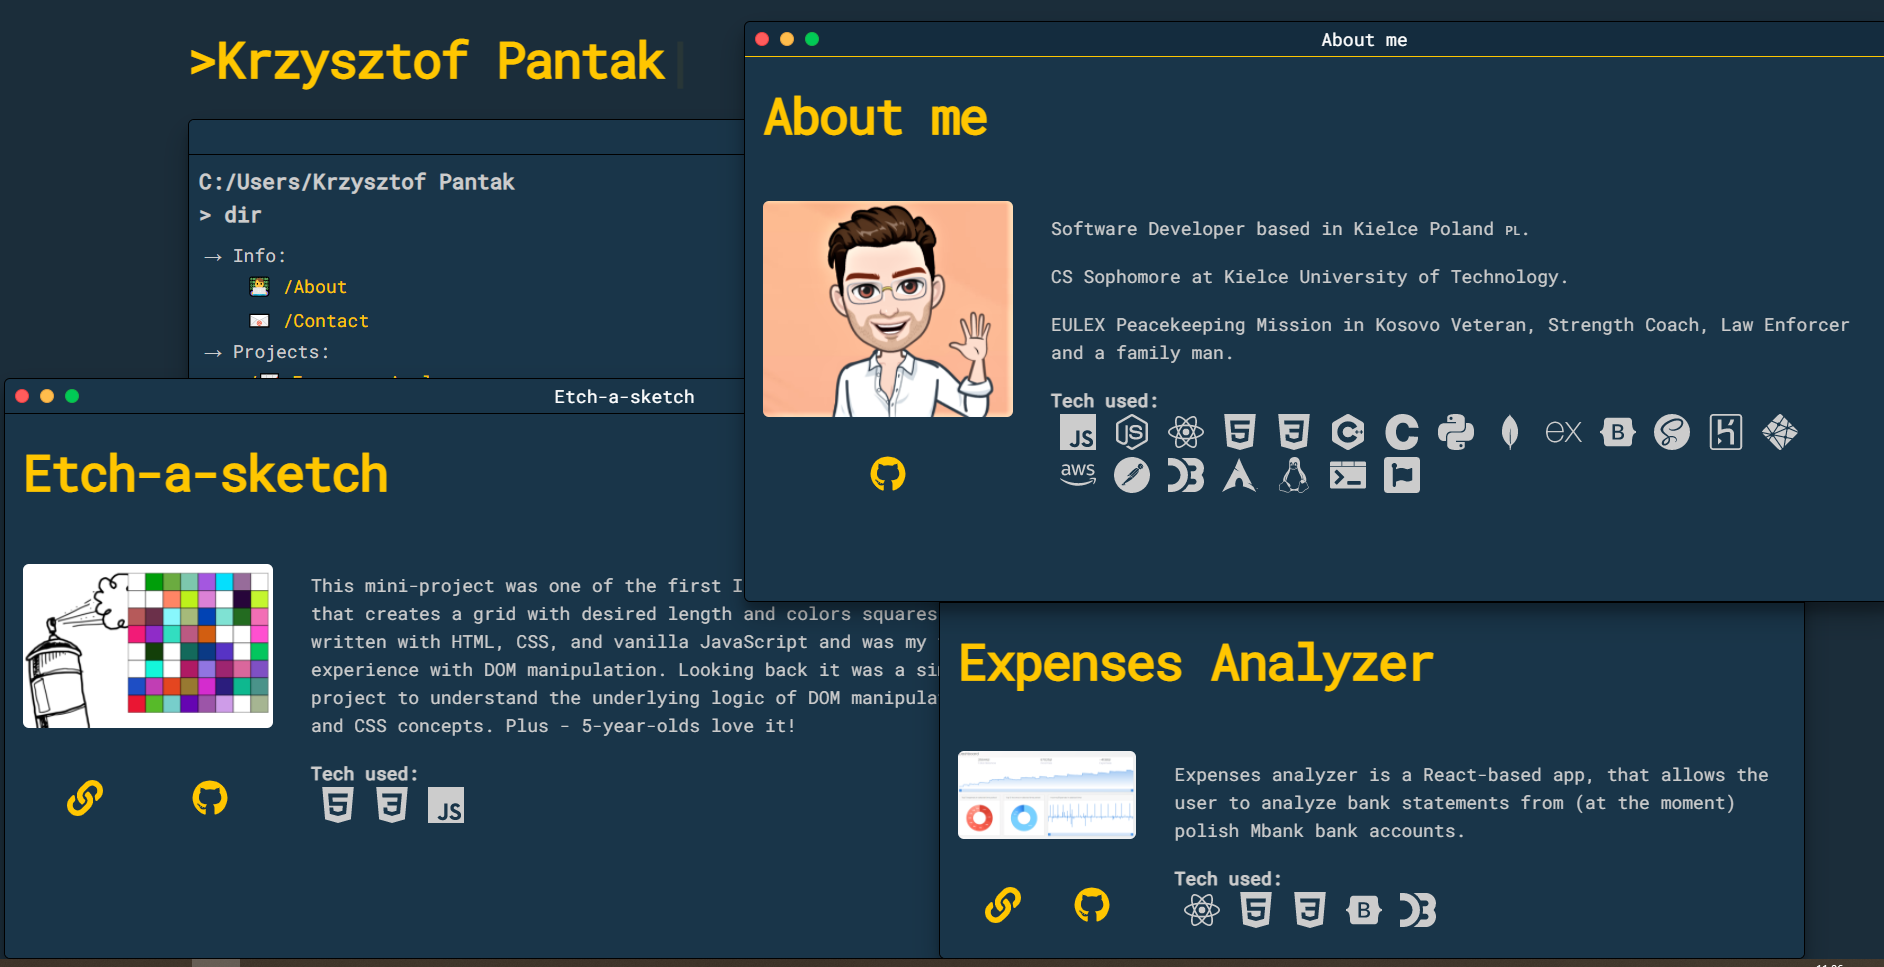
Terminal Portfolio is as the name suggests a terminal-themed portfolio showcasing a bit about myself and my projects. It's lightning-fast featuring nearly perfect Lighthouse Scores and clean UI and good UX.
On Desktop the portfolio items will be displayed with Winbox instances allowing users to resize, move and treat them as separate instances of 'terminal'. On Mobile, the portfolio items will be displayed as static sites generated by Gatsby for better User Experience and window controls of the device.
View Live · Found a Bug · Request Feature
This repo was created and designed to serve as my personal portfolio. Hovewer you can clone and use it as you see fit. To get a local copy up and running follow these simple steps.
-
npm
npm install npm@latest -g
npm install --global yarn
-
Clone the terminal portfolio
git clone https://github.com/Kielx/terminal-portfolio.git
-
Install NPM packages
yarn install
Now that the portfolio is installed you can run it locally and make it your own. Where do you start?
The list of projects and mini-projects are generated automatically by Gatsby from markdown files in this folder. Set up the list of your projects by opening /src/markdown-pages/ projects folder. Next, you should delete all of my projects while leaving one .md file as a template. Then update it accordingly:
/* src/markdown-pages/projects/your-project-name.md */
---
slug: "projects/country-quiz"
nameOfClass: "projects-items"
title: "Country Quiz"
listName: "🌎 /Country Quiz"
popupImageSrc: "country-quiz.webp"
popupImageAlt: "Country Quiz screenshot"
popupLiveLink: "https://country-quiz.pantak.net/"
popupGithubLink: "https://github.com/Kielx/country-quiz"
techIcons: [
        "react",
        "html5",
        "css3",
        "tailwindcss",
      ]
---

The project description goes here.
This is the frontmatter of the .md file. The rendered project will display information based on the contents of this part of .md file.
- Slug is the link that Gatsby will generate for the page.
- nameOfClass is the class name of the item in the project's lits. I've split projects into two lists - projects-items and mini-projects. If you would like to add a new project you can stick with projects-items if you want it to be a mini-project just add mini-project to the class name like this
nameOfClass: "projects-items miniProjects". - title - The title of the project that will be displayed inside Window
- List name - the name that will be displayed in the main terminal window
- popupImageSrc - the image that will be displayed in the popup window. It should be an image that is inside the
/staticfolder. - techIcons - an array of tech icons that will be displayed in popup window. Just add slugs of technologies that you want from Simple Icons Slugs
The second part of .md file contains a description that you can provide for your project as you see fit.
The same rules as for projects apply to the about page.
Changing colors couldn't be easier. Just adjust colors in /src/styles/styles.scss file.
The default theme is black so update the colors as you see fit.
/* src/styles/styles.scss */
:root {
  --primaryText: #ffc600;
  --secondaryText: #ccc;
  --linkText: #047be3;
  --bg: #1b2d3a;
  --windowBg: #193549;
  --focusBg: hsl(205, 51%, 16%);
  --borderColor: black;
}
All colors should be self-explanatory except for:
- bg - this is the color of the outer background
- windowBg - this is the color of displayed windows
- focusBg - the color of focused window title bars
You should update file /gatsby-config.js to match your project. You should change siteMetada and gatsby-plugin-manifest where you should provide an icon for PWA that should be included in src/images/your-image.jpg. Finally be sure to change your GTAG in gatsby config - if you plan to use google analytics. Otherwise you are free to remove the plugin entireley by removing entry for gatsby-plugin-google-gtag
There are many services that you can use to run your contact form. In my example, I used AWS API Gateway + AWS Lambda Function + AWS SES because it's the cheapest of all the options and scales well. It isn't the easiest option to set up however. For a detailed guide on how to set up and use the contact form you can use the following link
Alternatively, you can use Twilio Sendgrid or capture the form directly from Netlify forms if you host your version there.
You can set environment variables in .env.development file for local development, and .env.production for production.
Also you will need to set them up in netlify if you plan to deploy to their hosting.
GATSBY_AWS_CONTACT_FORM_API_URL = 'Your AWS API form url' - this is the url of the form that will be used to send emails from the contact form.
GATSBY_AWS_CONTACT_FORM_X_API_KEY = 'Your AWS API form key' - this is the key of the form that will be used to send emails from the contact form.
GATSBY_GOOGLE_GTAG = 'Your Google GTAG' - this is the GTAG that will be used to track your site if you decide to use google analytics.
NODE_VERSION = '14' - this is the node version that will be used to build your project. This variable is only needed when you are using netlify.Next you should update following components:
/src/components/layout - Insert your name.
/src/components/header - Change h1 with your own name.
Change typewriter typeString to your needs.
// src/components/header.js
 <Typewriter
              style={{ marginTop: 0, paddingTop: 0 }}
              options={{
                deleteSpeed: "natural",
              }}
              onInit={typewriter => {
                typewriter
                  .typeString("Software Developer")
                  .pauseFor(2500)
                  .deleteAll()
                  .typeString("Problem solver")
                  .pauseFor(2500)
                  .deleteAll()
                  .typeString("Krzysztof Pantak")
                  .callFunction(() => {
                    setIsLoaded(true)
                  })
                  .start()
}}Distributed under MIT License. See LICENSE for more information.
- Idea inspiration by Brad Traversy Terminal Style Landing Page
- Dark color theme inspired by Cobalt2 Theme Official by Wes Bos
- Light color theme inspired by Solarized Light
- Icons from Simple Icons and Font Awesome
