A web application which lists various jobs using the apijobs.dev . Built using React, Node.js, Express
A job board is a platform where employers post job vacancies, and job seekers can find and apply for these positions. It's an essential tool for employers to connect with potential employees globally. A typical job board allows users to search and filter available jobs and provides a form to apply for positions. Popular job boards include Upwork, Indeed, and Fiverr.
The apijobs API is a resourceful tool for job board application developers, offering access to a vast database of job listings. By integrating this API, developers can pull real-time job data, enhancing the job board's functionality and ensuring users have access to the latest job openings.
React is a widely-used open-source JavaScript library for building interactive user interfaces. It enables developers to create reusable UI components, facilitating the development of complex and dynamic web applications. When building a job board, React's component-based architecture allows for a modular approach, making it easier to manage and scale the application.
In this tutorial, you will delve into the apijobs API and explore how to utilize it to create a comprehensive job board website with React. You'll learn how to:
- Fetch and display job listings from the apijobs API.
- Implement functionalities to search and filter jobs.
- Design a user-friendly interface for job seekers to apply for jobs.
By the end of this guide, you'll have a functional job board website that not only presents job listings effectively but also provides a seamless user experience for job seekers.
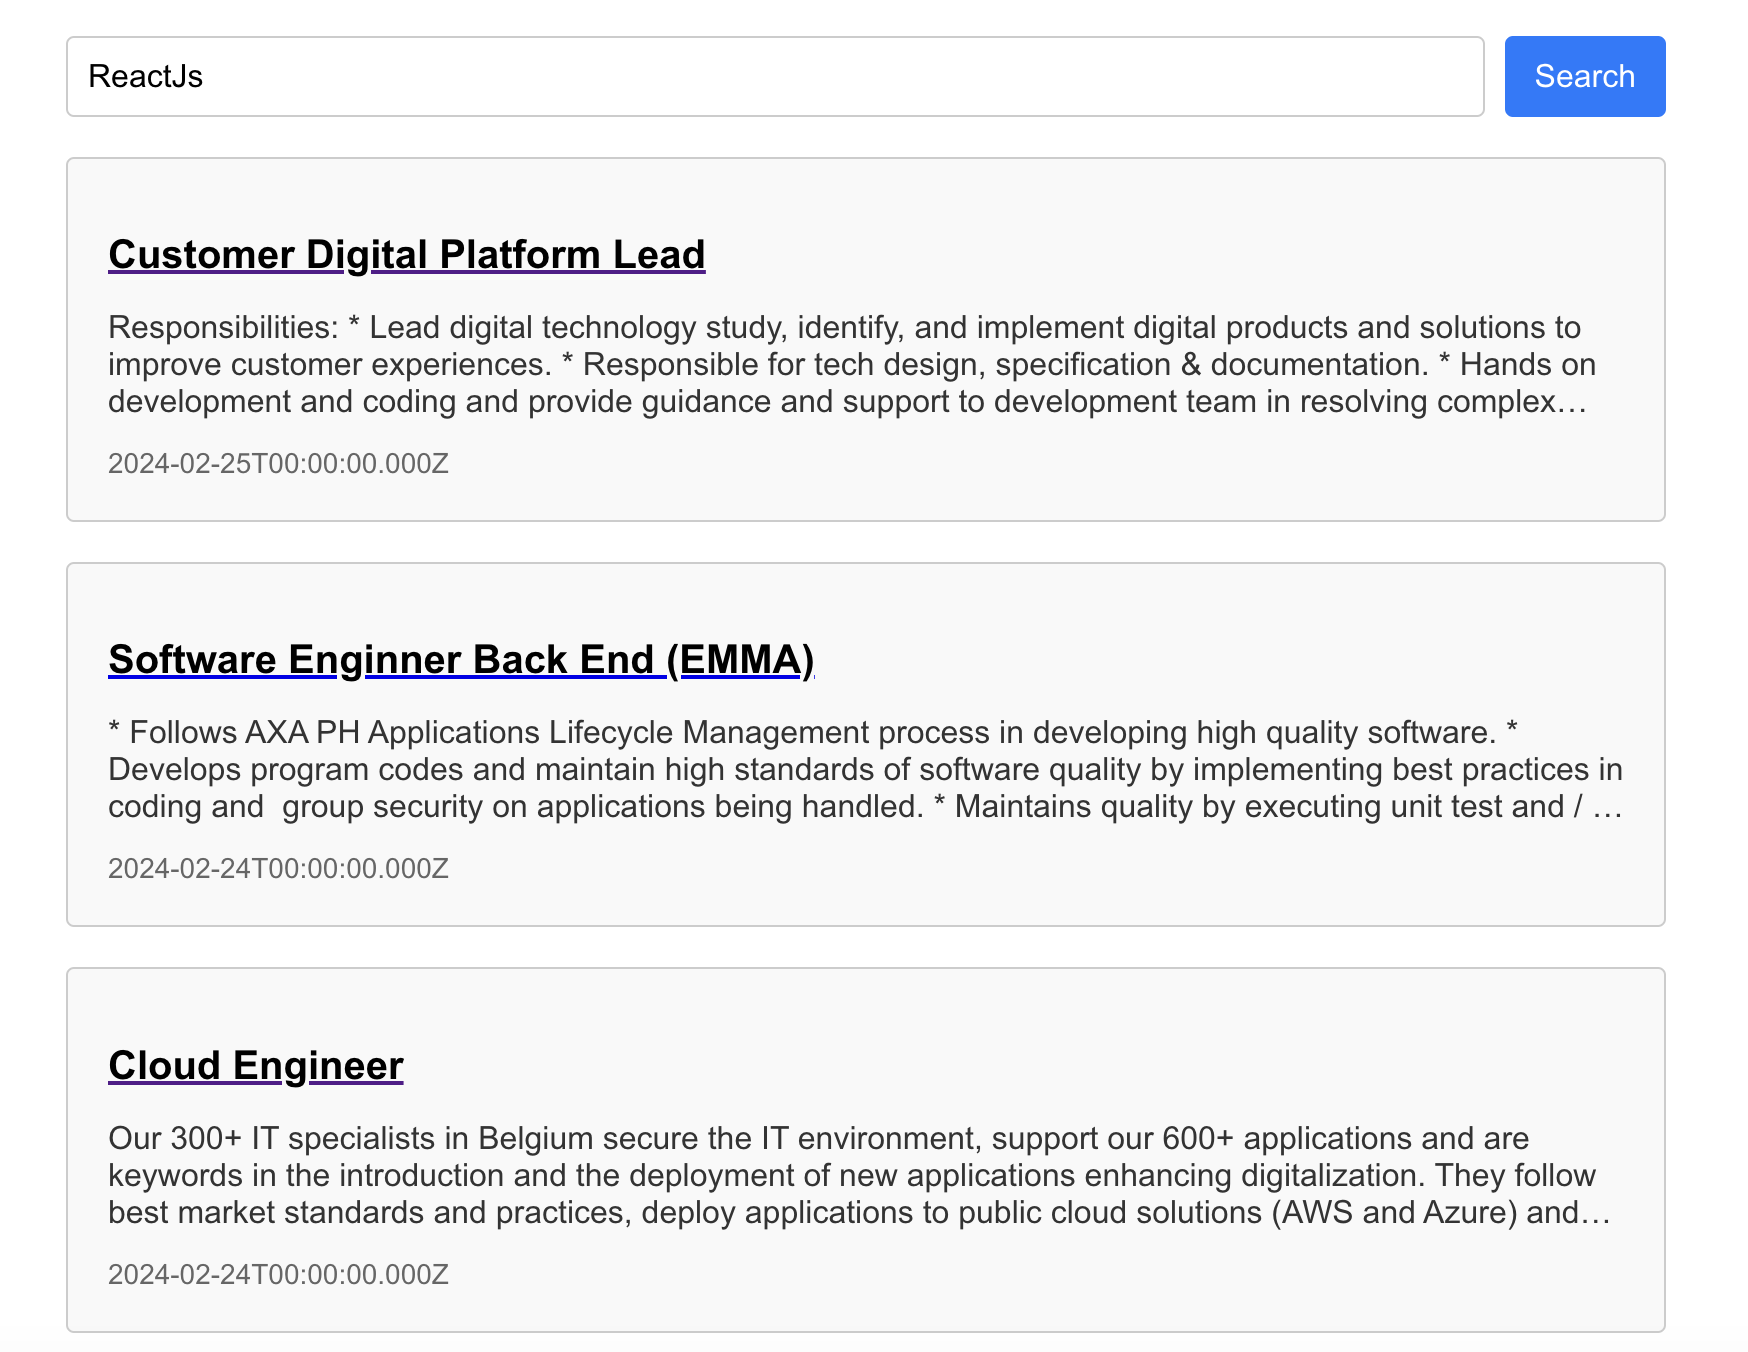
Let's have a look at what we'll accomplish at the end of this tutorial:
Connect apijobs api Create a user interface where employees can search and filter open jobs and apply for them (vacancy listing).
To complete this tutorial, you'll need the following software installed:
Node.js: v14 or v16 Npm or Yarn You should also be familiar with React.js.
To access job listings and integrate them into your job board, you need to create an account with apijobs.dev. Follow the steps below to set up your account and obtain your API key, which you'll use to fetch data from apijobs.dev.
-
Sign Up: Go to apijobs.dev on RapidAPI and sign up for an account. The process is straightforward and takes no more than 5 minutes.
-
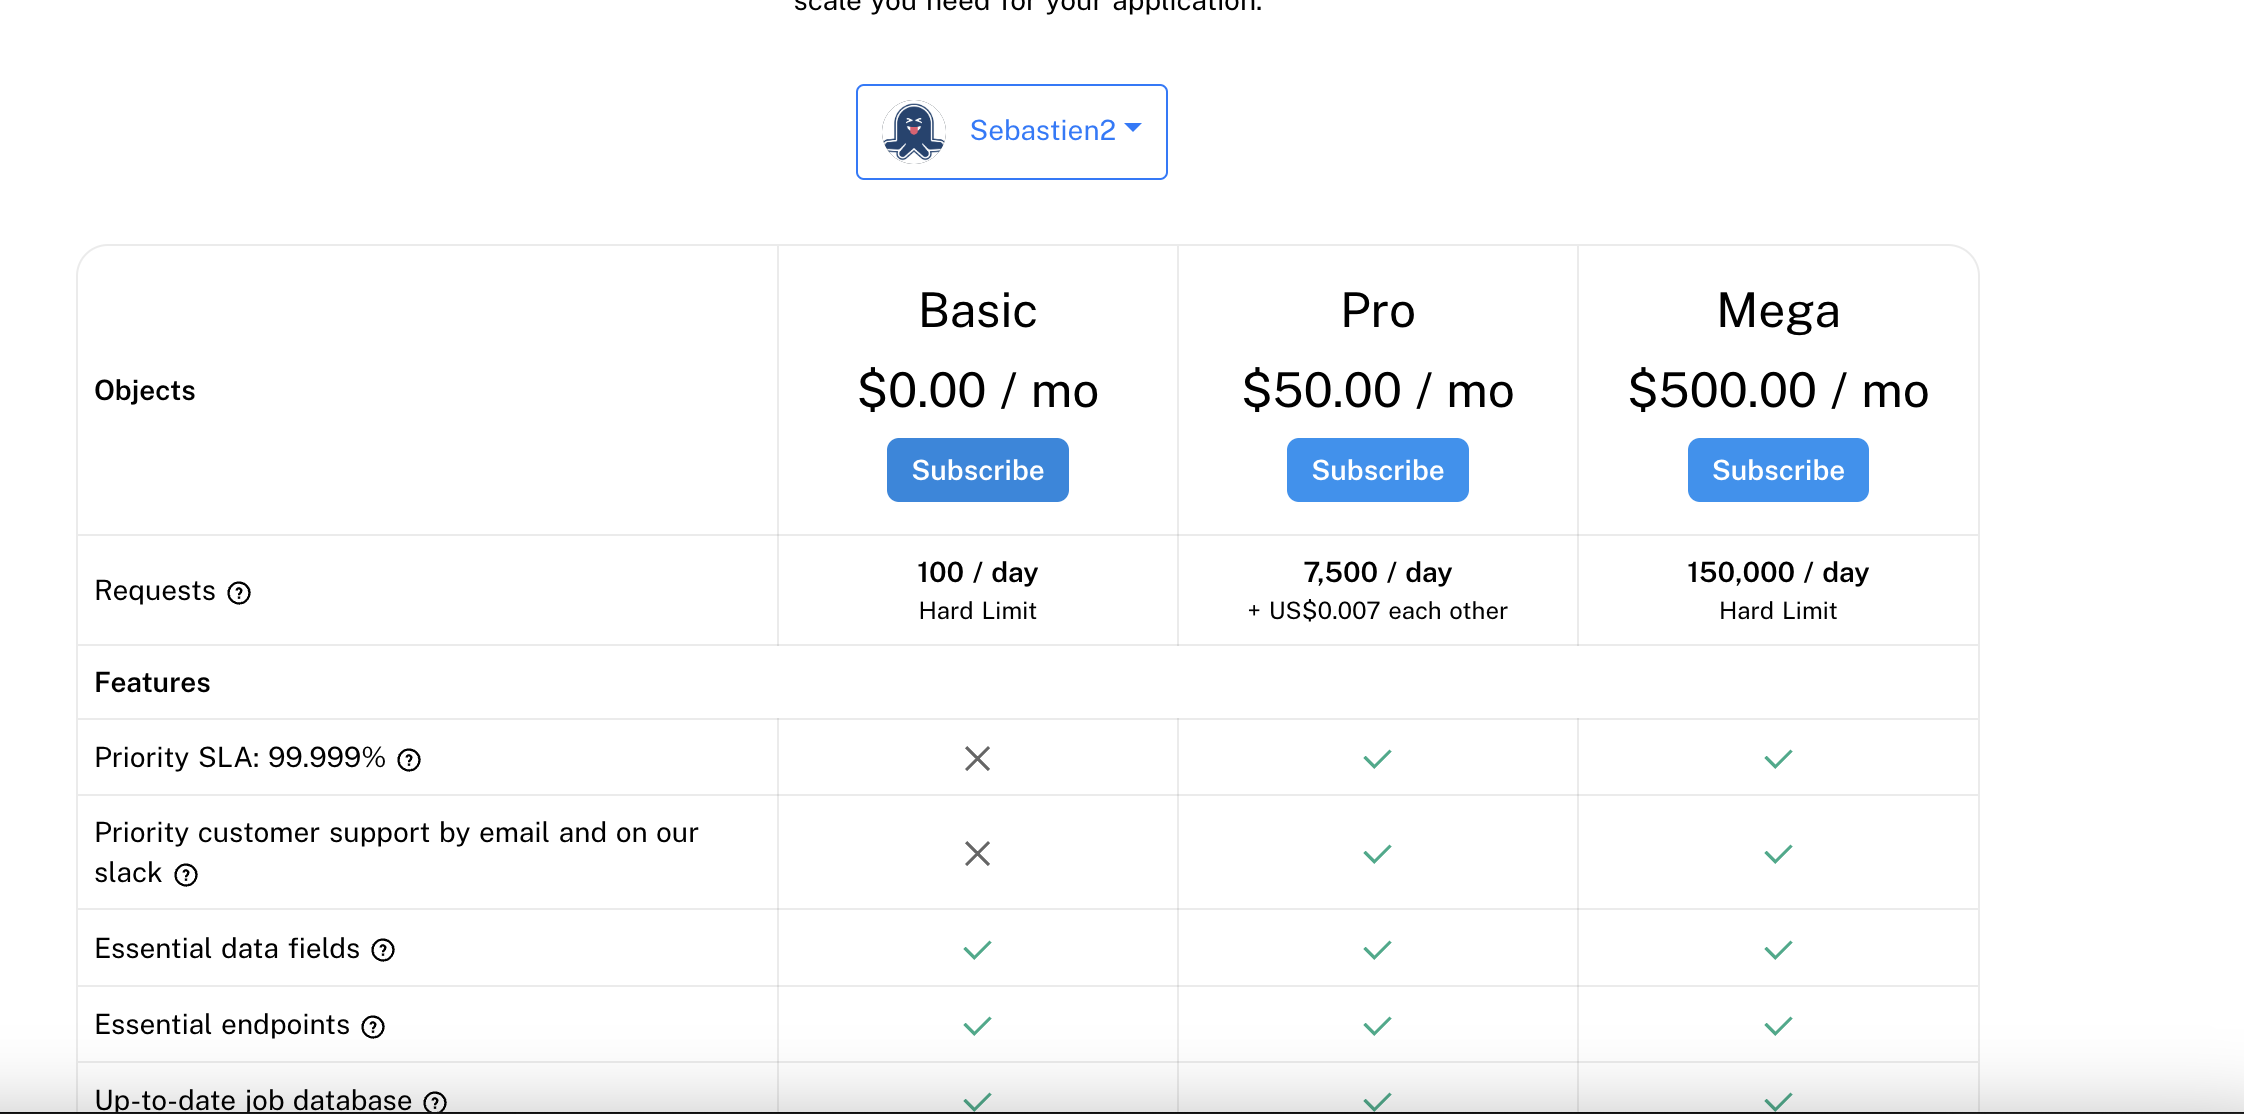
Choose a Plan: While signing up, select the free plan. This plan should suffice for the tutorial's scope and basic development/testing purposes.
-
API Key: After registration, you'll receive an
X-RapidAPI-Key. This key is essential for making API requests and will be used in your job board application to fetch job data. -
Verification: Ensure your account is active and verified to avoid any disruptions while accessing the apijobs API.
-
Subscription Confirmation: After subscribing to the free plan, you should see a confirmation similar to the image below. It indicates that you're all set to use the apijobs API.
With your apijobs account ready and your API key in hand, you're now set to integrate apijobs API calls into your job board application.
Now that we have set up the back-end, we will start building the application interface and its functionalities next.
React Installation Open a new terminal and install react with the command below.
npx create-react-app job-board
cd job-board
npm start
This part will have the following features: a search bar for searching for a job and the list of all jobs Navigate to src/pages, open app.js in any code editor, paste the following code, and then save it.
import React, { useEffect, useState } from 'react';
import './App.css';

function App() {
  const [search, setSearch] = useState('ReactJs');
  const [results, setResults] = useState([]);
  const [loading, setLoading] = useState(false);

  useEffect(() => {
    searchJobs();
  }, []);

  async function searchJobs() {
    setLoading(true);
    setResults([]);
    const options = {
      method: 'POST',
      headers: {
        'content-type': 'application/json',
        'X-RapidAPI-Key': 'your-api-key', // Remember to keep your API key secure
        'X-RapidAPI-Host': 'apijob-job-searching-api.p.rapidapi.com',
      },
      body: JSON.stringify({ q: search }),
    };

    const url = 'https://apijob-job-searching-api.p.rapidapi.com/v1/job/search';
    const response = await fetch(url, options);
    const data = await response.json();
    setResults(data.hits);
    setLoading(false);
  }

  return (
    <div className="app">
      <div className="search-container">
        <input
          type="text"
          value={search}
          onChange={(e) => setSearch(e.target.value)}
          className="search-input"
        />
        <button className="search-button" onClick={searchJobs}>Search</button>
      </div>
      <div className="results-container">
        {loading && <div className="loading">Loading...</div>}
        {results.map((job, index) => (
          <div className="job-card" key={index}>
            <a href={job.url} target="_blank" rel="noopener noreferrer" className="job-link">
              <h2 className="job-title">{job.title}</h2>
            </a>
            <p className="job-description">{job.description}</p>
            <p className="job-organization">{job.hiringOrganization}</p>
            <div className="job-location">{job.locationName}</div>
            <div className="job-date">{job.datePosted}</div>
          </div>
        ))}
      </div>
    </div>
  );
}

export default App;
Next, let's add style to the application. Inside the src folder, create a style.css file and add the following:
Style
.app {
  font-family: 'Arial', sans-serif;
  color: #333;
  max-width: 800px;
  margin: 0 auto;
  padding: 20px;
}

.search-container {
  display: flex;
  justify-content: space-between;
  margin-bottom: 20px;
}

.search-input {
  padding: 10px;
  font-size: 16px;
  border: 1px solid #ccc;
  border-radius: 4px;
  flex-grow: 1;
  margin-right: 10px;
}

.search-button {
  padding: 10px 15px;
  background-color: #007bff;
  color: white;
  border: none;
  border-radius: 4px;
  cursor: pointer;
  font-size: 16px;
}

.search-button:hover {
  background-color: #0056b3;
}

.job-card {
  border: 1px solid #ccc;
  border-radius: 4px;
  padding: 20px;
  margin-bottom: 20px;
  background-color: #f9f9f9;
}

.job-title {
  font-size: 20px;
  color: #000;
  margin-bottom: 5px;
}

.job-description {
  font-size: 16px;
  overflow: hidden;
  display: -webkit-box;
  -webkit-line-clamp: 3;
  -webkit-box-orient: vertical;
  text-overflow: ellipsis;
  margin-bottom: 10px;
}

.job-organization,
.job-location,
.job-date {
  font-size: 14px;
  color: #666;
}
Congratulations on completing the tutorial! By now, you should have a fully functional job board application. The screenshot below represents the final result of your efforts, showcasing the operational job board interface where users can interact with the job listings fetched from the apijobs API.
This image illustrates the successful integration of various components of your application, including the front-end built with React and the back-end powered by apijobs API. It's a testament to your ability to follow the steps outlined in the tutorial and implement a practical, interactive web application.
Take a moment to review the features demonstrated in the screenshot. It should display a list of job vacancies, a search bar for filtering jobs, and possibly other functionalities you've implemented. If your application looks different, revisit the tutorial steps to ensure all aspects are correctly implemented.
With this foundation, you can now explore further enhancements, like adding more sophisticated filters, improving the UI/UX design, or integrating additional APIs to enrich the job board's functionality.
Now we have successfully built a complete job board website from scratch. This tutorial explains what apijobs is, how to get started and how to use it with React to build a complete job board application.


