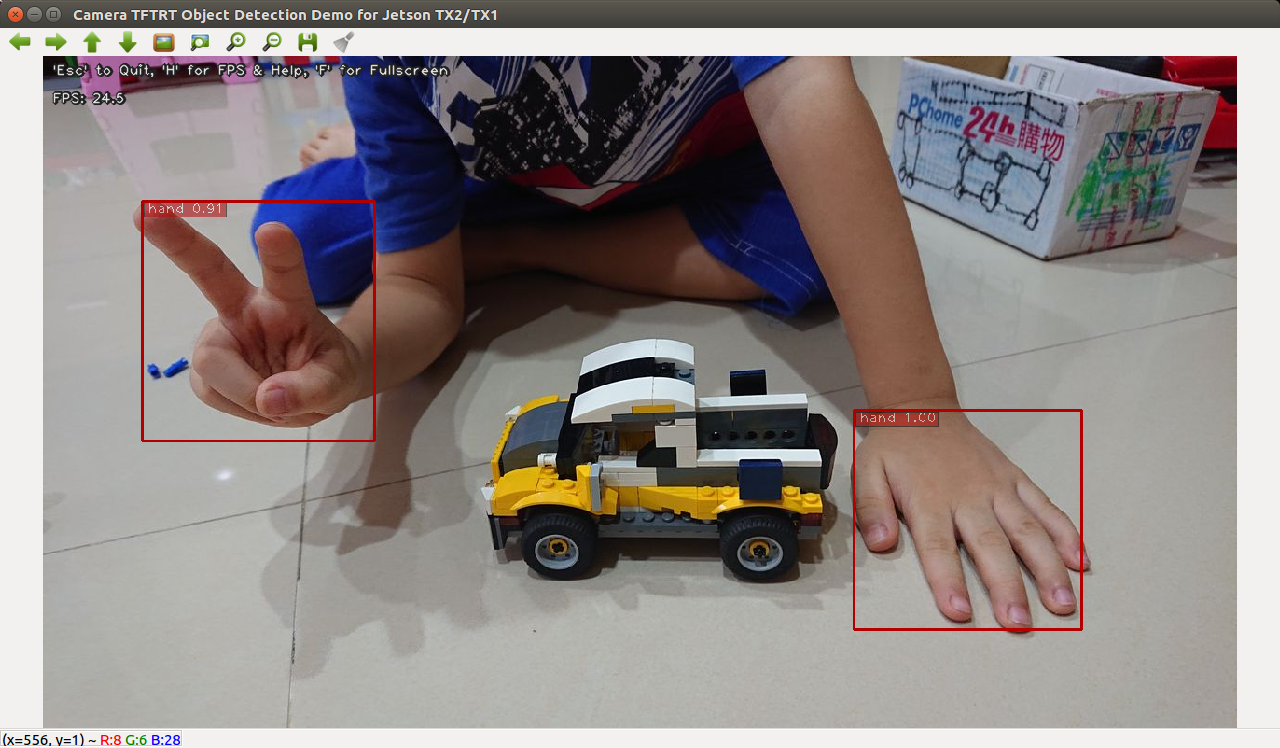
This repository was forked from NVIDIA's tf_trt_models repository. It contains sctipts to optimize TensorFlow models with TensorRT, as well as scripts for testing/demo. The models are sourced from the TensorFlow models repository. This repository mainly focuses on object detection models.
Refer to these blog posts for more details:
Otherwise, here are the steps:
-
Flash the target Jetson TX2 system with either JetPack-3.2.1 (TensorRT 3.0 GA included) or JetPack 3.3 (TensorRT 4.0 GA). (I have also tested the code on Jetson Nano with JetPack-4.2.)
-
Install OpenCV 3.4.x on Jetson. Reference: How to Install OpenCV (3.4.0) on Jetson TX2 or Installing OpenCV 3.4.6 on Jetson Nano.
-
Download and install tensorflow-1.8.0 (with TensorRT support). More specifically, download this pip wheel if you are using JetPack-3.2.1, or this pip wheel if you are using JetPack-3.3. Then install it with
pip3.$ sudo pip3 install tensorflow-1.8.0-cp35-cp35m-linux_aarch64.whl2019-05-24 update: Originally I encountered "extremely long TF-TRT model loading time issue" when I tested with tensorflow-1.9.0+. That's why I recommended tensorflow-1.8.0 before. Recently I realized the issue was due to the python3 'protobuf' module, and I have a solution. I documented the solution in my TensorFlow/TensorRT (TF-TRT) Revisted post. With the solution applied, you could actually use any tensorflow of version 1.8.0 or higher, as long as it has the TenroRT support. For example, you could build/install tensorflow-1.12.2 from source, or just use a pip3 wheel provided by NVIDIA.
-
Clone this repository. (Do use this repository instead of NVIDIA's original tf_trt_models repository, if you would like to run the script described below.)
$ cd ~/project $ git clone --recursive https://github.com/jkjung-avt/tf_trt_models $ cd tf_trt_models -
Run the installation script.
$ ./install.sh
Please refer to the original NVIDIA-Jetson/tf_trt_models for code snippets which demonstrate how to download pretrained object detection models, how to build TensorFlow graph and how to optimize the models with TensorRT.
The author has tested various TensorFlow object detection models and shared the result on NVIDIA's Jetson TX2 Developer Forum.
Note the benchmark timings were gathered after the Jetson TX2 was placed in MAX-N mode. To set TX2 into MAX-N mode, run the following commands in a terminal:
$ sudo nvpmodel -m 0
$ sudo ~/jetson_clocks.sh
The camera_tf_trt.py script supports video inputs from one of the following sources: (1) a video file, say mp4, (2) an image file, say jpg or png, (3) an RTSP stream from an IP CAM, (4) a USB webcam, (5) the Jetson onboard camera. Check out the help message about how to invoke the script with a specific video source.
$ python3 camera_tf_trt.py --help
usage: camera_tf_trt.py [-h] [--file] [--image] [--filename FILENAME] [--rtsp]
                        [--uri RTSP_URI] [--latency RTSP_LATENCY] [--usb]
                        [--vid VIDEO_DEV] [--width IMAGE_WIDTH]
                        [--height IMAGE_HEIGHT] [--model MODEL] [--build]
                        [--tensorboard] [--labelmap LABELMAP_FILE]
                        [--num-classes NUM_CLASSES] [--confidence CONF_TH]

This script captures and displays live camera video, and does real-time object
detection with TF-TRT model on Jetson TX2/TX1

optional arguments:
  -h, --help            show this help message and exit
  --file                use a video file as input (remember to also set
                        --filename)
  --image               use an image file as input (remember to also set
                        --filename)
  --filename FILENAME   video file name, e.g. test.mp4
  --rtsp                use IP CAM (remember to also set --uri)
  --uri RTSP_URI        RTSP URI, e.g. rtsp://192.168.1.64:554
  --latency RTSP_LATENCY
                        latency in ms for RTSP [200]
  --usb                 use USB webcam (remember to also set --vid)
  --vid VIDEO_DEV       device # of USB webcam (/dev/video?) [1]
  --width IMAGE_WIDTH   image width [1280]
  --height IMAGE_HEIGHT
                        image height [720]
  --model MODEL         tf-trt object detecion model [ssd_inception_v2_coco]
  --build               re-build TRT pb file (instead of usingthe previously
                        built version)
  --tensorboard         write optimized graph summary to TensorBoard
  --labelmap LABELMAP_FILE
                        [third_party/models/research/object_detection/data/msc
                        oco_label_map.pbtxt]
  --num-classes NUM_CLASSES
                        number of object classes [90]
  --confidence CONF_TH  confidence threshold [0.3]
The --model option could only be set to ssd_inception_v2_coco (default) or ssd_mobilenet_v1 now. It would likely be extended to support more object detection models in the future. The --build option only needs to be done once for each object detection model. The TensorRT optimized graph would be saved/cached into a protobuf file, so that later invocations of the script could load the cached graph directly without going through the optimization process again.
Example #1: build TensorRT optimized 'ssd_mobilenet_v1_coco' model and run real-time object detection with USB webcam.
$ python3 camera_tf_trt.py --usb --model ssd_mobilenet_v1_coco --build
Example #2: verify the optimized 'ssd_mobilenet_v1_coco' model with NVIDIA's original 'huskies.jpg' picture.
$ python3 camera_tf_trt.py --image --filename examples/detection/data/huskies.jpg --model ssd_mobilenet_v1_coco
Here is the result of example #2.
Refer to the following blog posts for more details:
- Training a Hand Detector with TensorFlow Object Detection API
- Deploying the Hand Detector onto Jetson TX2
After you've trained your own hand detector with one of the following models, you'll be able to optimize the model with TF-TRT and run it on TX2.
ssd_mobilenet_v1_egohands
ssd_mobilenet_v2_egohands
ssdlite_mobilenet_v2_egohands
ssd_inception_v2_egohands
faster_rcnn_resnet50_egohands
faster_rcnn_resnet101_egohands
faster_rcnn_inception_v2_egohands
Be sure to copy your trained model checkpoint files into the corresponding data/xxx_egohands/ folder. Say, you've done that for ssd_mobilenet_v1_egohands. Then you could optimize the model and test it with an image like this:
$ python3 camera_tf_trt.py --image \
                           --filename jk-son-hands.jpg \
                           --model ssd_mobilenet_v1_egohands \
                           --labelmap data/egohands_label_map.pbtxt \
                           --num-classes 1 \
                           --build
