ukelonn a webapp for weekly allowance
Ukelonn is a webapp where your children can register chores they do, and you can register payments of weekly allowance, based on the chores they have done.er en webapp der ungene dine kan registrere jobber de gjør i hjemmet og du kan registrere utbetalinger.
(installation instructions in Norwegian)
The webapp will give the children (and you) a report on how where they are, compared to the previous month and compared tothe previous year.
The webapp also has functionality for adding bonus periodes (at our house we’ve had a tradition for double the pay for chores performed during advent, to get more money for christmas presents.

The webapp can be run locally, or it can be run in the cloud.
The advangate of running the webapp locally, is the one doesn’t have to study how to aquire a computing resource in the cloud.
The advantage of running in the cloud, is that you don’t have to have a computer powered and running at all times, in your house. Another advantage is that the webapp can be reached from outside of the home network.
Locally the webapp can be run on a PC running windows, a PC running GNU/linux or it can be run on a Mac.
It’s possible to run the webapp on a RaspberryPi with Raspbian. However, running an RMDBS like PostgreSQL, will probably not do wonders for the lifetime of the SD card serving as the Pi’s “hard disk”…? I once managed to kill an RPi’s SD-card with a month of eager writing.
In the examples in this installation guide, I’m assuming the webapp will be installed locally on a windows PC.
See ukelonn installing on debian for instructions on how to install on debian/ubuntu/raspbian.
The database system used, is PostgreSQL.
Download and install PostgreSQL. Use defaults for all questions. Remember the password you give as the admin password during the installation.
The exact version of PostgreSQL used isn’t critical. Use the newest version that’s available on the computer you’re installing on (on a 64 bit Windows PC, the newest version is 13.1 at the time of writing. That will work fine. But older versions will work fine as well).
After installation, create a PostgrerSQL user “karaf” with password “karaf”, and then create two empty databases named “authservice” and “ukelonn”, both owned by user “karaf” (the database authservice will contain user information).
Note: the password “karaf” can, and should, be changed at a later point in time. But during installation, the default password must be used.
To create the user and the databases, start “pgAdmin 4” from the windows start menu and provide the password you used during PostgreSQL installation.
In “pgAdmin 4”:
- Right click “Login/Group Roles” and choose Create->Login/Group Role…
- In the dialog “Create - Login/Group Role”
- Choose the tab “General”
- In “Name”, type:
karaf - Choose the tab “Definition”
- In “Password”, type:
karaf - Choose the tab “Privileges”
- Set “Can login?” to “Yes”
- Click the button “Save”
- Right click “Databases” and choose Create->Database…
- In the dialog “Create - Database”
- Choose the tab “General”
- In “Database”, type:
authservice - In “Owner”, type:
karaf - Click the button “Save”
- Right click “Databases” and choose Create->Database…
- In the dialog “Create - Database”
- Choose the tab “General”
- In “Database”, type:
ukelonn - In “Owner”, choose:
karaf - Click the button “Save”
At this point, the PostgreSQL server is ready to be used by the webapp.
Download, and run, the installer for openjdk 11.
(If you already have Java 11 installed, you don’t have to do this step. But Java 8 will not be good enought, since the application have been run with Java 11, and use stuff not found in Java 8)
Follow the quick start guide to dowload, and unpack, a zip-file containing the newest version of karaf, and start karaf.
What the instructions boil down to, are:
- Download the zip-file of the newest version of karaf
- Unpack the zip-file
- Open a command line window (“DOS prompt” in windows), and cd into the directory unpacked from the zip file and type the command:
.\bin\karaf.bat
Karaf will start up with a command line expecting commands.
The next section gives the commands given to this command line to download and install the webapp.
First add the maven repository containing the ukelonn webapp:
config:edit org.ops4j.pax.url.mvn
config:property-append org.ops4j.pax.url.mvn.repositories ", https://maven.bang.priv.no/repository/@id=ukelonn@snapshots"
config:property-set org.ops4j.pax.url.mvn.globalUpdatePolicy always
config:update
Set the default GUI language to English and use English text in the initial database data:
config:edit no.priv.bang.ukelonn.backend.UkelonnServiceProvider
config:property-set defaultlocale en_GB
config:update
config:edit no.priv.bang.ukelonn.db.liquibase.test.ProductionLiquibaseRunner
config:property-set databaselanguage en_GB
config:update
Install the application itself
feature:repo-add mvn:no.priv.bang.ukelonn/karaf/LATEST/xml/features
feature:install ukelonn-with-postgresql
The instructions assumes that the computer the webapp has been installed on is named “ukelonn” and is shown as “ukelonn” in the home LAN.
Open http://ukelonn:8181/ukelonn in a browser, and log in as user admin with password admin.
Choose “Administrate users” and then “Add user”.
Add at least one administrator. This is a user that can add users, new job types, new payment types, and register allowance payments.
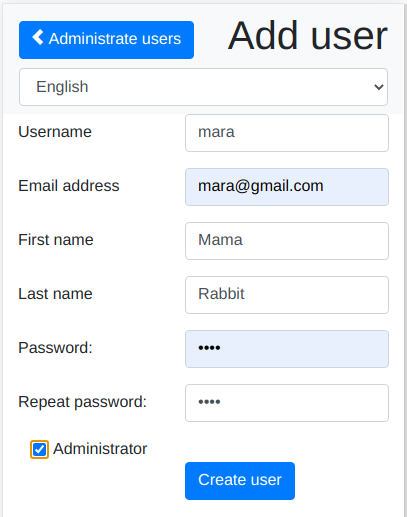
Add one or more regular users. These are users that do chores and register them, and receive payments.

At the top, choose “Administrate jobs and job types”, and then choose “Modify job types”

Check if the amounts look sensible, and adjust the amounts, if not.
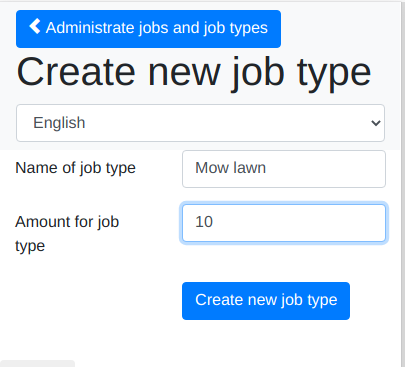
If there are job types you feel are missing, choose “Adminitrate jobs and job types”, and then “Create new job type” and add the job types you need:
It is possible to create “bonuses” running for a period of time, that can give and increased payout for chores.
Select “Administrate bonuses” and then “Create new bonus” and then e.g. create a Christmas bonus, giving twice the payout for the period (as shown in the example):
(The URL for the Christmasy image used to prettify the bonus, is https://www.bang.priv.no/ikoner/holly.png )