-
Notifications
You must be signed in to change notification settings - Fork 3
Tutorial 3: Notifications
The watch is capable of creating different types of notifications. For this exercise we'll be creating a demo notification that pops up saying "This is a Demo Notification"
✨ (S U R P R I S E !) ✨
We'll be using TDD AGAIN. This is your life now...
Here are the principles again for your reference:
●  Write a failing test
●  Write just enough code to make the test pass
    ○ YAGNI - You Ain't Going To Need It
●  Refactor
●  Write the next failing test
●  Rinse and repeat
We want our Demo notification to say "This is a Demo Notification: [message]" where [message] is our custom message sent through the form.
Create the file client/js/notifications/DemoNotification/DemoNotification.spec.js
Let's add a test to check for the phrase "This is a Demo Notification:"
const DemoNotification = require("./DemoNotification");

describe("DemoNotification", () => {
    describe("#render", () => {
      it("should render my page correctly", () => {
        const notification = new DemoNotification();
        expect(notification.render()).toContain("This is a Demo Notification:");
      });
    });
});
Run the test with ./go test:dev.
The test should fail with an output that looks something like this:
FAIL  client/js/notifications/DemoNotification/DemoNotification.spec.js
  ● Test suite failed to run

    Cannot find module '../../src/js/notifications/DemoNotification/DemoNotification' from 'DemoNotification.spec.js'

    > 1 | const DemoNotification = require("./DemoNotification");
        |                          ^
      2 |
      3 | describe("DemoNotification", () => {
      4 |     describe("#render", () => {

      at Resolver.resolveModule (node_modules/jest-resolve/build/index.js:221:17)
      at Object.<anonymous> (client/notifications/DemoNotification/DemoNotification.spec.js:1:26)
We need to define our Demo Notification now to make this test pass 😤 All notifications will extend our Base Notification which is essentially a page (a type of page).
Create the file client/src/notifications/DemoNotification/DemoNotification.js
const BaseNotification = require("watch-framework").BaseNotification;
const NotificationHub = require("watch-framework").NotificationHub;

module.exports = class DemoNotification extends BaseNotification {
  template = require("./DemoNotification.hbs");
};Like our pages, we use handlebars to hold our html content in a template property. We call the template method to return its contents aka our demo notification message.
Create a new file client/src/notifications/DemoNotification/DemoNotification.hbs and add our notification like so:
This is a Demo Notification:
<div id="message">
  {{message}}
</div>
Like every other page we need to export it to be used in other files. In this case we can append module.exports = DemoNotification or export it straight when declaring the class as we did in our javascript file module.exports = class DemoNotification extends BaseNotification
const DemoNotification = require('./DemoNotification');We're almost there !! All we have to do is link it to be displayed in the dropdown list of options.
In notifications.js we import our new notification and add it to the list. You should have something like this:
const AlertNotification = require('./notifications/AlertNotification/AlertNotification');
const DemoNotification = require('./notifications/DemoNotification/DemoNotification');

const notifications = [
  {
    type: "demo",
    label: "Demo",
    defaultValue: "Our First Notification!",
    view: DemoNotification,
},One last thing before we see that 💚 sweet, sweet green pass 💚. Go into notifications.spec.js and change in the line below to have length 3 because we now have 3 alerts in the dropdown list.
expect(notifications).toHaveLength(3);On the home page there should now be our Demo option in the dropdown list and when you send it to the watch... It should now display with some message
This is a Demo Notification: [message]
Congratulations !! We're not done yet.
At the moment all the buttons hide the notification by default but we can change this (to whatever we want it to do..) ! Let's configure the right arrow key to highlight the demo notification's message in red so we can see it clearer.
~ Let's write a failing test ~ In DemoNotification.spec.js add this test:
    describe("#rightButtonEvent", () => {
      it("highlight message in red", () => {
        document.body.innerHTML = `<div id='message'></div>`;
        const notification = new DemoNotification();
        notification.rightButtonEvent();
        expect(document.getElementById('message').style.backgroundColor).toBe('red');
      });
    });
It should fail. as usual. The output should look something like this:
 FAIL  client/src/js/notifications/DemoNotification/DemoNotification.spec.js
  DemoNotification
    #render
      ✓ should render my page correctly (115ms)
    #rightButtonEvent
      ✕ highlight message in red (71ms)

  ● DemoNotification › #rightButtonEvent › highlight message in red

    expect(received).toBe(expected) // Object.is equality

    Expected: "red"
    Received: ""

      14 |         const notification = new DemoNotification();
      15 |         notification.rightButtonEvent();
    > 16 |         expect(document.getElementById('message').style.backgroundColor).toBe('red');
         |                                                                          ^
      17 |       });
      18 |     });
      19 | });

at Object.<anonymous> (client/src/js/notifications/DemoNotification/DemoNotification.spec.js:16:74)In DemoNotification.js add the following into the class under the line template = require("./DemoNotification.hbs");
  rightButtonEvent() {
    var messageDiv = document.getElementById("message");
    messageDiv.style.backgroundColor = 'red';
  }
and now... the tests should pass!!
But you know what...It kinda looks a bit boring 💩 So let's make it look a little... cuter! 🌸🍉💕(◠︿◠✿)
All the styling for our notifications is contained in ./framework/styles/notification.scss
The black background of the pop-up really isn't that appealing. Let's change the background colour to something lighter and also put a shiny, pink border around it!
Something like this...:
#notification-container {
  background-color: #f2ece4;
  color: #036;
  border-color: #b37399;
  box-shadow: 0 0 10px #b37399;
Hmm...🤔🤔 it's not that cute. something is missing!!
There is only one person who can save us now...
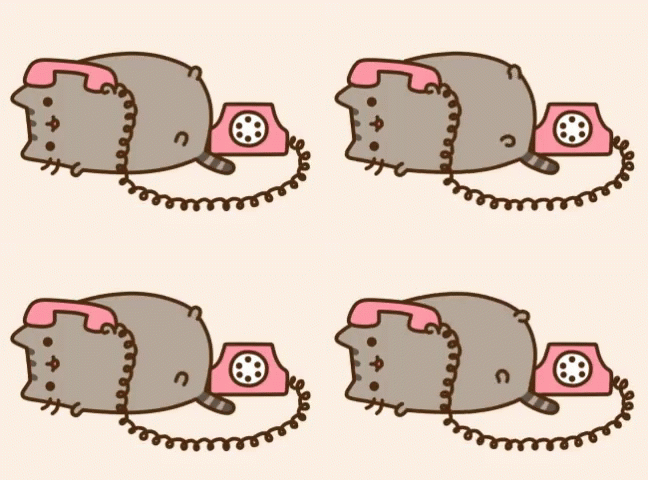
^ ^ ^ PUSHEEN ^ ^ ^
Let's add Pusheen or an image of your choice to the client/src/images folder.
In our handlebars page add it in the image tag and you should have something like this:
<img src="../images/busyPusheen.png" height="100">Let's see how it looks! Purrfect ~ ♡ (Hahahahahahaha get it? because Pusheen is a cat and cats PURR)
Good job!!
