SimSwitch is a city management simulation game centered on sustainable urban mobility. As the urban planning director, players must balance the needs of citizens while promoting eco-friendly transportation solutions. From redesigning neighborhoods with bike lanes and green spaces to managing budgets, public policies, and unexpected challenges, every decision shapes the city's future. With dynamic citizen behaviors and varied layouts, SimSwitch offers players the chance to reimagine urban mobility in a modern world.
SIMPLE plugin must be installed and required GAMA 2024-06 or above
- Compatible Gama version to be found among snapshot releases - here
- Simple plugin repository
Warning
The project is being developped using Unity Editor 2022.3.40f1. Although it should work with newer versions, as is doesn't use any version-specific features, it is recommanded to use exactly the same Editor version.
Once the project is opened in Unity, if you have any errors, you can check the following points:
- Make sure that Newtonsoft Json is installed. Normaly, cloning this repo should ensure that it is installed. But if it's not the case, follow the tutorial on this link.
- To work properly, we assume that you already have a compatible GAMA model. It is also highly recommended that you install Gama Server Middleware as well.
Tip
For Windows users, make sure that the folder Assets/Plugins contains a .dll file called websocket-sharp. If not, download it from this repo. And place it in Assets/Plugins in your Unity project.
- If you're using Windows: run
start.bat, located in the root of the Middleware directory. - If you're using MacOS or Linux: run
start.sh, located in the root of the Middleware directory.
The middleware will open a new page (http://localhost:8000) on your default web browser. if this page does not appear, just reload the page.
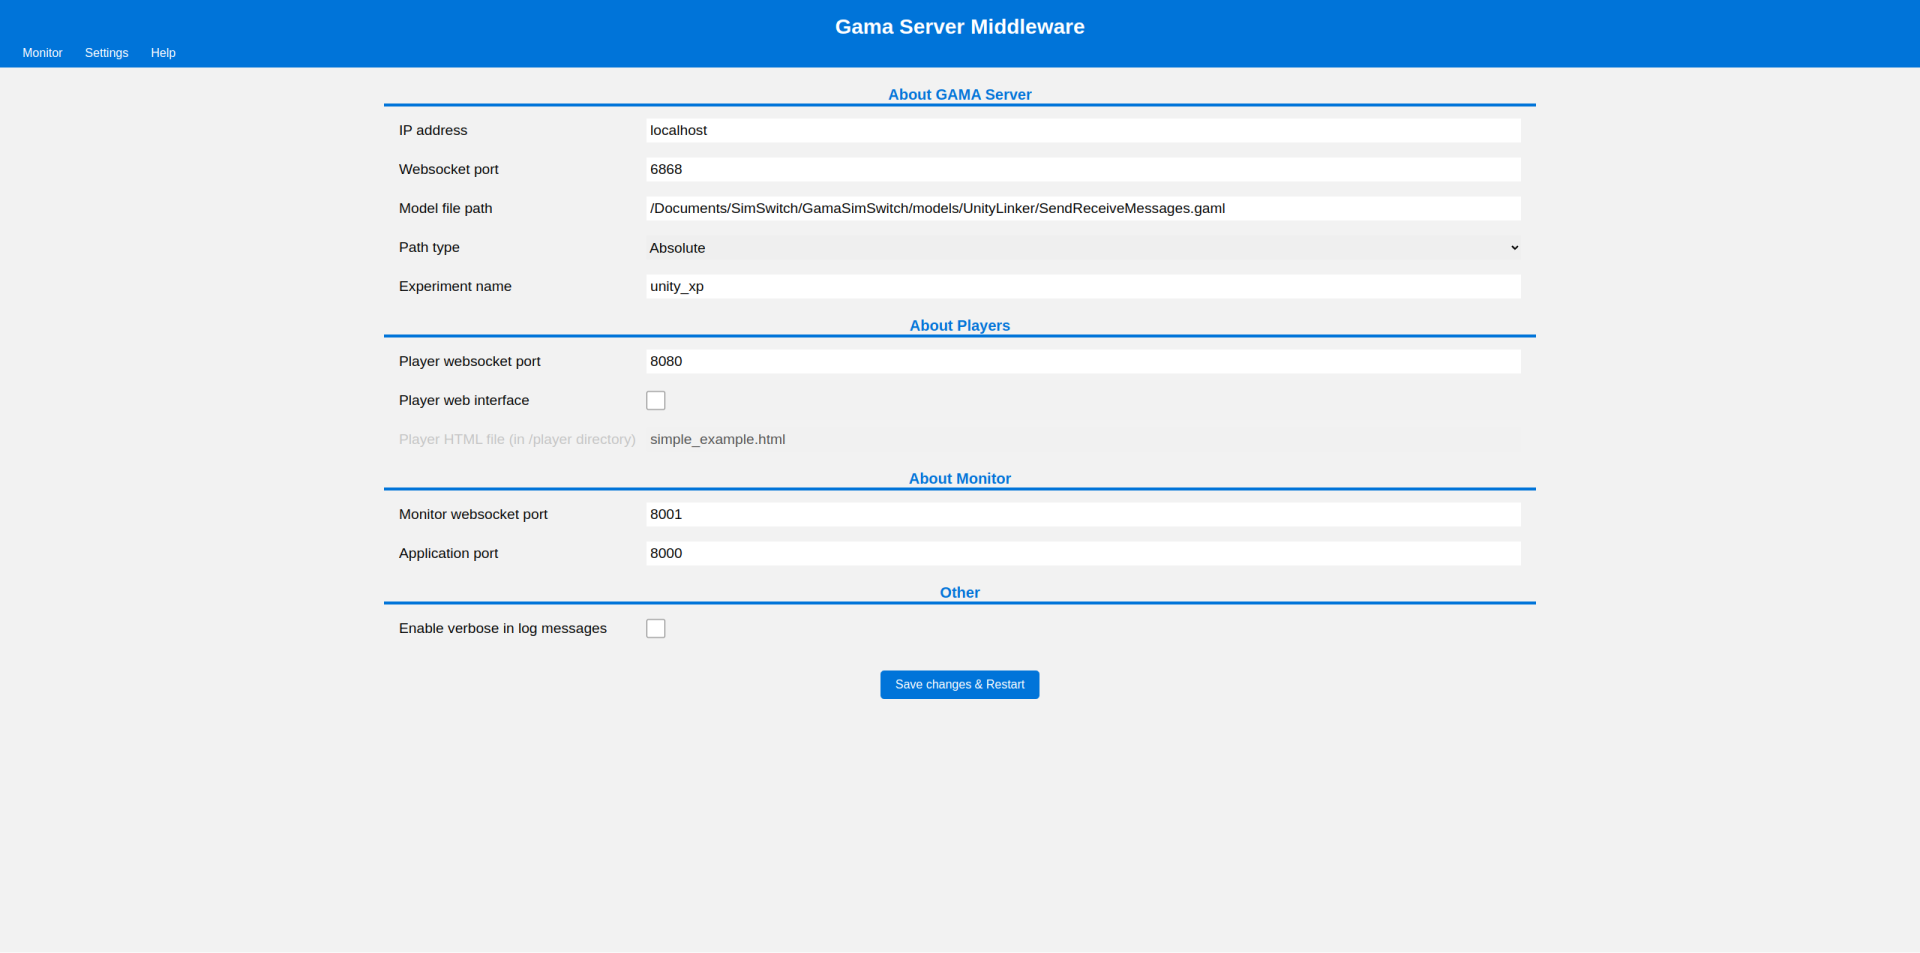
Once the Middleware is running, open its monitor page to configure the necessary settings.
Note
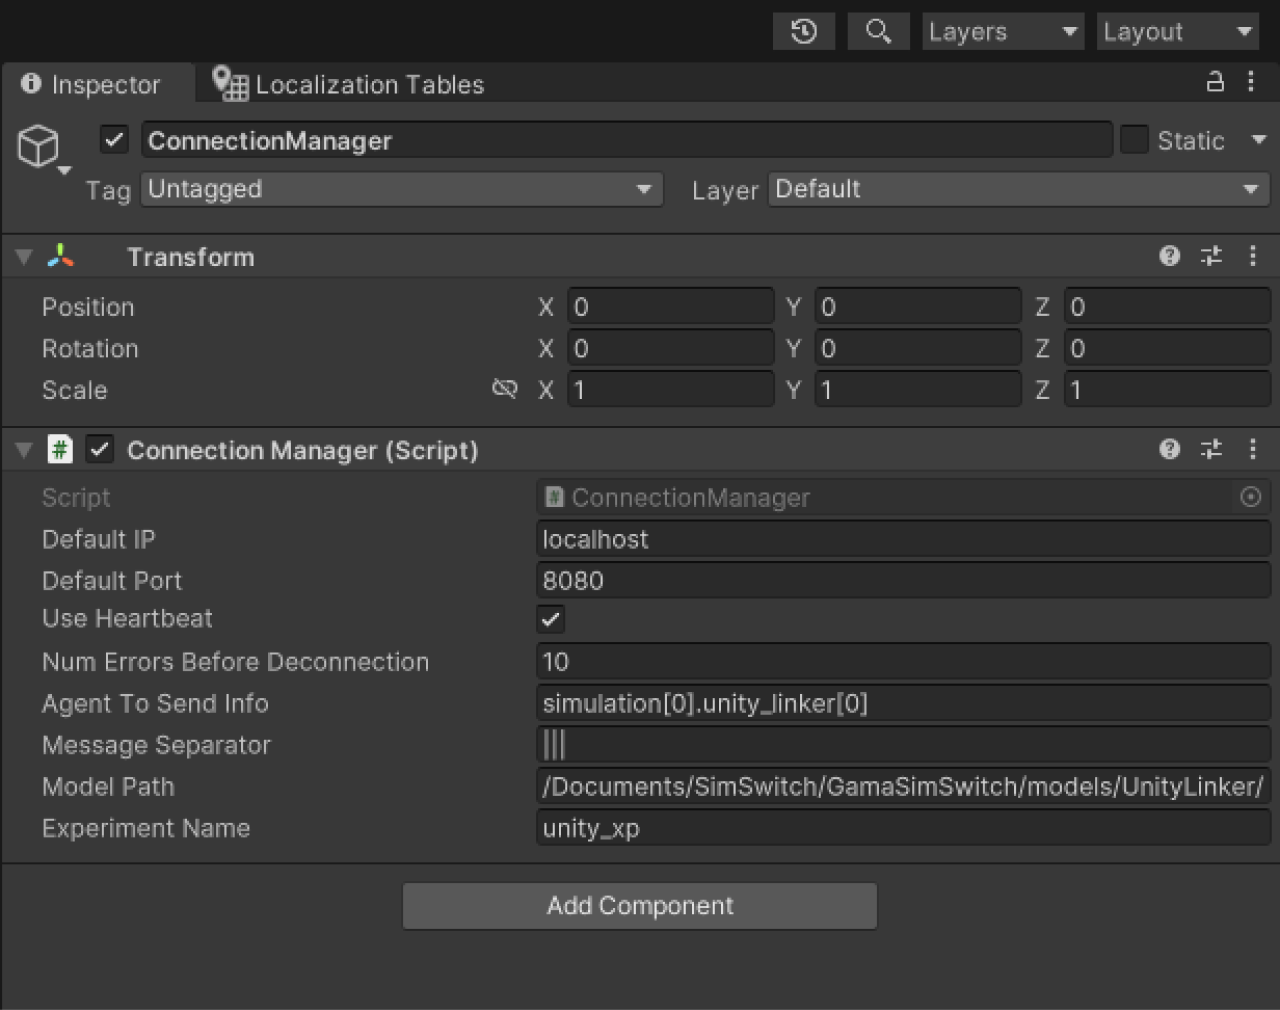
The WebSocket port must match the port opened by GAMA. You can verify this in GAMA by navigating to: Support > Preferences > Execution. The Player WebSocket port should match the port specified in the Unity scene. (next step)
After the Middleware is successfully connected to your GAMA model, open Unity and launch a scene that contains a ConnectionManager component in the hierarchy.
Note
Ensure the values in the Middleware parameters correspond to those defined in your Unity ConnectionManager.
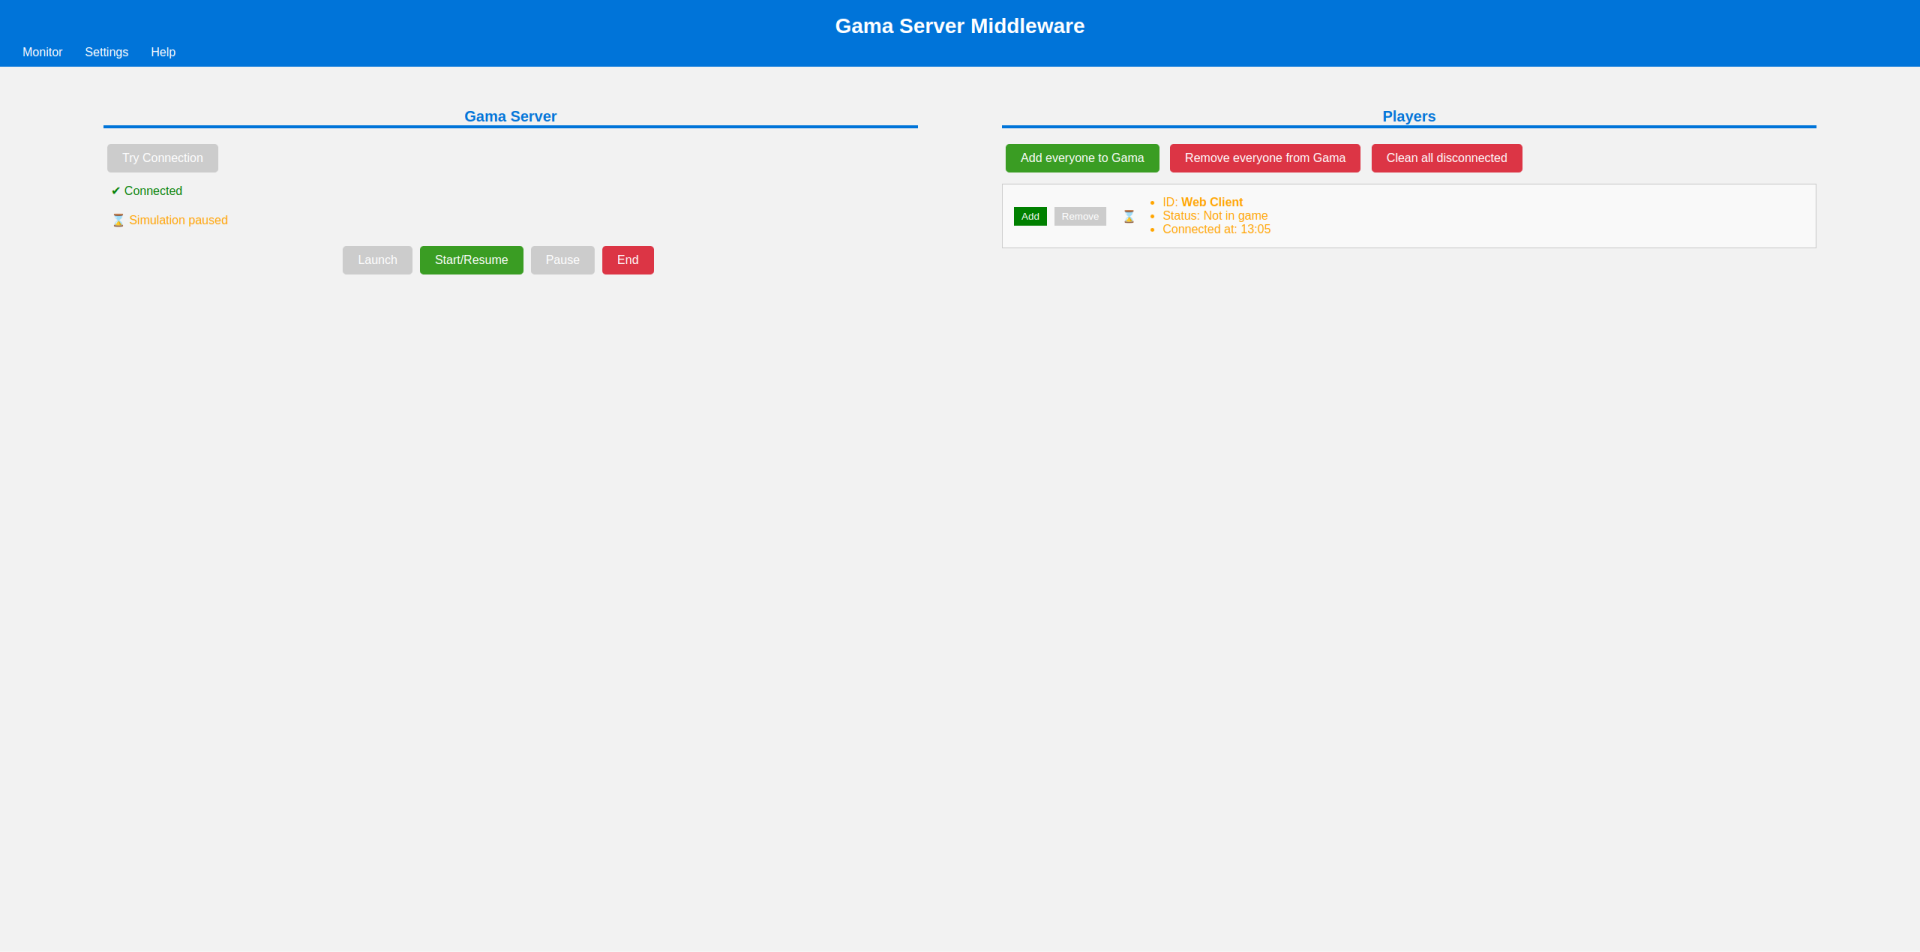
Return to the Middleware monitor page and launch your experiment.
Switch back to Unity and play the scene.
In the Middleware, you will notice Unity attempting to connect to GAMA. Once this is visible, click Add in the Middleware, which will automatically launch the GAMA experiment.
Important
To learn more about how the Unity/GAMA linker works, visit this repository.


