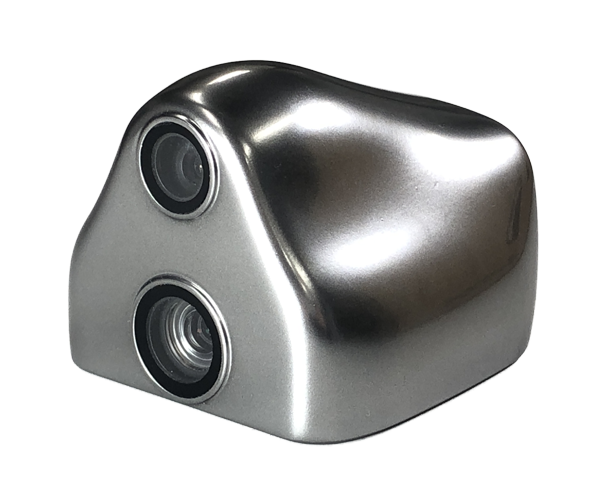
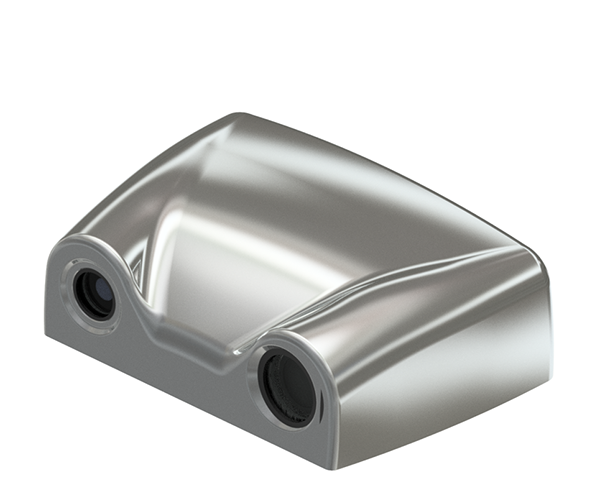
The toroboeye_ros provides a ROS interface for the toroboeye.
- Torobo Eye ROS
The recommended configuration is ROS Melodic Morenia with Ubuntu 18.04. This package has only been tested for the one recommended above.
toroboeye_bringup: A package that has launch file to start Torobo Eye ros applications.toroboeye_camera: A package that has services to control Torobo Eye.toroboeye_description: A package that has the configuration model infomation of Torobo Eye.toroboeye_examples: A package that has examples (currently only capture example is included) using ros service.toroboeye_gui: A package that has gui tools to control Torobo Eye.toroboeye_msgs: A packages that defines Torobo Eye's original commands.toroboeye_ros: A metapackage that put together all packages for ros.
- You can use this package after you have finished to install pytoroboeye in your pc.
- If you don't have pytoroboeye package, Please contact us.
This operation is unnecessary if ROS Melodic Morenia has already been installed.
Install build essentials
sudo apt update -y
sudo apt install -y build-essential
sudo apt install -y python-dev
sudo apt install -y python-pip
Install ROS Melodic Morenia
sudo sh -c 'echo "deb http://packages.ros.org/ros/ubuntu $(lsb_release -sc) main" > /etc/apt/sources.list.d/ros-latest.list'
sudo apt install -y curl
curl -s https://raw.githubusercontent.com/ros/rosdistro/master/ros.asc | sudo apt-key add -
sudo apt update
sudo apt install -y ros-melodic-desktop-full
echo "source /opt/ros/melodic/setup.bash" >> ~/.bashrc
source ~/.bashrc
sudo apt install -y python-rosdep python-rosinstall python-rosinstall-generator python-wstool python-catkin-tools
sudo rosdep init
rosdep update
source ~/.bashrc
echo "source `catkin locate --shell-verbs`" >> ~/.bashrc
source ~/.bashrc
Install build essentials
sudo apt update -y
sudo apt install -y build-essential
sudo apt install -y python-dev
sudo apt install -y python-pip
Install ROS Noetic Ninjemys
sudo sh -c 'echo "deb http://packages.ros.org/ros/ubuntu $(lsb_release -sc) main" > /etc/apt/sources.list.d/ros-latest.list'
sudo apt install -y curl
curl -s https://raw.githubusercontent.com/ros/rosdistro/master/ros.asc | sudo apt-key add -
sudo apt update
sudo apt install -y ros-noetic-desktop-full
echo "source /opt/ros/noetic/setup.bash" >> ~/.bashrc
source ~/.bashrc
sudo apt install -y python3-rosdep python3-rosinstall python3-rosinstall-generator python3-wstool python3-catkin-tools
sudo rosdep init
rosdep update
source ~/.bashrc
echo "source `catkin locate --shell-verbs`" >> ~/.bashrc
source ~/.bashrcmkdir -p ~/catkin_ws/src
cd ~/catkin_ws
catkin initcd ./src
git clone https://github.com/TokyoRobotics/toroboeye_rossudo pip install -U PyYAMLPlease place the toroboeye_ros package under ~/catkin_ws/src/ below before doing the following operations.
The directory structure is as follows.
~/catkin_ws
           `--src
                 `--toroboeye_ros
                      |--toroboeye_bringup
                      |--toroboeye_camera
                      |--toroboeye_description
                      |--toroboeye_examples
                      |--toroboeye_gui
                      |--toroboeye_msgs
                      `--toroboeye_ros
Please build with the following command.
cd ~/catkin_ws
catkin build
catkin sourceLaunch toroboeye_bringup.launch, captured image and pointcloud publish node is started. also lanunched rviz and toroboeye gui. you can cofirm captured image(color and depth) and pointcloud in rviz.
roslaunch toroboeye_bringup toroboeye_bringup.launch camera:=true rviz:=true gui:=trueYou can use these topics for desired application (image processing and machine learning etc.).
| Topic Name | Type | Note |
|---|---|---|
/toroboeye/camera/color/image |
sensor_msgs/Image | publish color image encoded 'rgb8'. |
/toroboeye/camera/depth/image |
sensor_msgs/Image | publish depth image encoded '32FC1'. |
/toroboeye/camera/camera_info |
sensor_msgs/CameraInfo | publish camera parameter. |
/toroboeye/camera/point_cloud |
sensor_msgs/PointCloud2 | publish point cloud. |
Also, The parameters related to the camera are managed in some yaml files. A brief description of each parameter is given below.
- toroboeye_camera/params/param_capture_setting.yaml
| Parameter Name | Type(default : available range) | Note |
|---|---|---|
device_ip_address |
- | set device ip address of toroboeye for desiring connection. |
device_illuminant_power |
8 : 0~8 | see document pytoroboeye for detailed explanation. |
device_illuminant_color |
2 : 2~5 | see document pytoroboeye for detailed explanation. |
depth_cording_pattern_index |
7 : 7~8 | see document pytoroboeye for detailed explanation. |
depth_accuracy |
2 : 1~6 | see document pytoroboeye for detailed explanation. |
depth_exposure_time |
1 : 1~6 | see document pytoroboeye for detailed explanation. |
color_strobe_intensity |
4 : 0~8 | see document pytoroboeye for detailed explanation. |
color_exposure_time |
1 : 1~6 | see document pytoroboeye for detailed explanation. |
- toroboeye_camera/params/param_filter.yaml
| Parameter Name | Type(default : available range) | Note |
|---|---|---|
amplitude_depth_scale |
1000 : (fixed) | see document pytoroboeye for detailed explanation. |
upper_base_limit |
1 : 0~255 | see document pytoroboeye for detailed explanation. |
lower_amplitude_limit |
255 : 0~255 | see document pytoroboeye for detailed explanation. |
gradient_threshold |
10 : (fixed) | see document pytoroboeye for detailed explanation. |
edge_dilation_value |
2 : (fixed) | see document pytoroboeye for detailed explanation. |
min_area_x |
0 : 0~1440 | see document pytoroboeye for detailed explanation. |
min_area_y |
0 : 0~1080 | see document pytoroboeye for detailed explanation. |
max_area_x |
1440 : 0~1440 | see document pytoroboeye for detailed explanation. |
max_area_y |
1080 : 0~1080 | see document pytoroboeye for detailed explanation. |
depth_range_min |
200 : 200~700 | see document pytoroboeye for detailed explanation. |
depth_range_max |
700 : 200~700 | see document pytoroboeye for detailed explanation. |
| Parameter Name | Type(default : available range) | Note |
|---|---|---|
colorbalance_gain_red |
1.5 : 0.0~4.0 | see document pytoroboeye for detailed explanation. |
colorbalance_gain_blue |
1.0 : 0.0~4.0 | see document pytoroboeye for detailed explanation. |
colorbalance_gain_green |
2.0 : 0.0~4.0 | see document pytoroboeye for detailed explanation. |
input_level_dark |
0 : 0~255 | see document pytoroboeye for detailed explanation. |
input_level_light |
255 : 0~255 | see document pytoroboeye for detailed explanation. |
output_level_dark |
0 : 0~255 | see document pytoroboeye for detailed explanation. |
output_level_light |
255 : 0~255 | see document pytoroboeye for detailed explanation. |
brightness_gamma |
1.0 : 0.0~2.0 | see document pytoroboeye for detailed explanation. |
sharpness_level |
0.0 : 0.0~4.0 | see document pytoroboeye for detailed explanation. |
When you run the launch file, it will run multiple service server to control Torobo Eye device. A brief description of all service is given below. and you can use these service for your desired application. if you get detail information for service, Please check document pytoroboeye.
| Service Name | Service Type | Note |
|---|---|---|
connect |
toroboeye_msgs.srv/Connect | connect Torobo Eye device to PC installed ROS. |
disconnect |
toroboeye_msgs.srv/Disconnect | disconnect Torobo Eye device. |
get_capture_setting |
toroboeye_msgs.srv/GetCaptureSetting | get current capture setting(accuracy and exposure time etc.) in device. |
set_capture_setting |
toroboeye_msgs.srv/SetCaptureSetting | set your desired capture setting to device. |
write |
toroboeye_msgs.srv/Write | non users use service. |
activate |
toroboeye_msgs.srv/Activate | activate Torobo Eye device. |
deactivate |
toroboeye_msgs.srv/Deactivate | deactivate Torobo Eye device. |
capture |
toroboeye_msgs.srv/Capture | capture color image and depth image. |
wait_for_state |
toroboeye_msgs.srv/WaitForState | get state(connection ,activate, capture etc). |
wait_for_active |
toroboeye_msgs.srv/WaitForActive | if activation finish, this service return value. |
wait_for_inactive |
toroboeye_msgs.srv/WaitForInactive | if deactivation finish, this service retuen value. |
wait_for_frame |
toroboeye_msgs.srv/WaitForFrame | get captured image(color image and depth image). |
stop |
toroboeye_msgs.srv/Stop | stop capture (Only use in the case of capturing continuous). |
get_intrinsics |
toroboeye_msgs.srv/GetIntrinsics | get camera parameter. |
update_frame |
toroboeye_msgs.srv/WaitForFrame | update captured image for publishing ros messages. |
update_intrinsics |
toroboeye_msgs.srv/GetIntrinsics | update inttrinsics for publishing ros messages. |
One example is included in this package currently.
You can use that example to capture your scene at any time. Also you can incorporate it into your program by referring to the example.
For example, after connecting to the device and activating it, one shot is taken. If you run example, run the following command in your teminal.
roslaunch toroboeye_example toroboeye_capture_example.launch After capturing, save color and depth images(.png). the launch file load one yaml file (param_capture_exaqmple.yaml). if you change saving image directory, you need to edit the value of 'save directory' in yaml file.
- toroboeye_example/params/param_capture_example.yaml
| Parameter Name | Type | Note |
|---|---|---|
save_directory |
string | specify the saving image directory . |
This project is licensed under BSD 3-clause license, see the LICENSE file for details.


